Cycling Cleat Positioning Guide: How to Set Up Cleats for Maximum Power and Injury Prevention
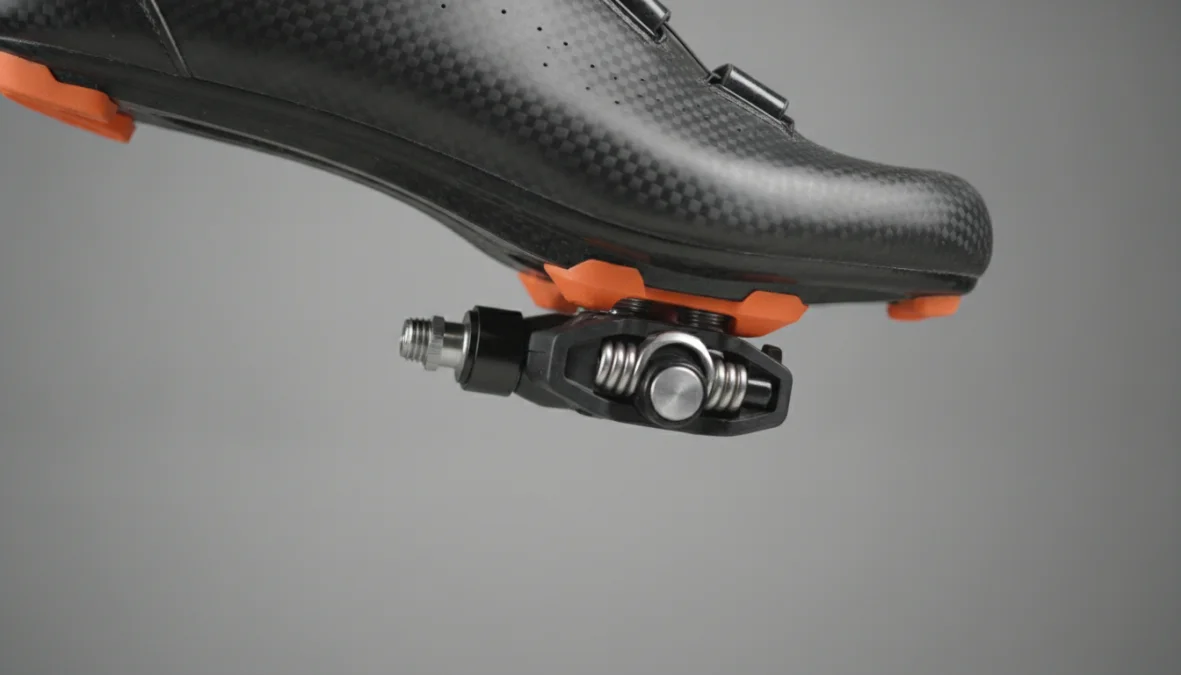
Ever hopped off your bike after a long ride with screaming knees, numb toes, or mysterious hot spots on your feet? Before you blame your fitness level or those new hills you tackled, take a look down at your cycling shoe cleats. That small piece of metal or plastic connecting you to your pedals has way more influence over your comfort and performance than most riders realize. Getting your cycling cleat positioning dialed in properly can be the difference between crushing your power numbers pain-free and limping through every ride wondering why cycling feels so hard.
Why Cycling Cleat Positioning Matters
Let’s cut to the chase: cycling cleat positioning is absolutely critical for everything from injury prevention to power transfer. Your cycling shoe cleats create the foundation of your entire pedal stroke, and when that foundation is off—even by just a few millimeters—the effects ripple up through your ankles, knees, hips, and lower back.
The most common problems from incorrect bike cleat setup include anterior knee pain (that nagging ache at the front of your kneecap), hot spots on the ball of your foot, numbness in your toes, achilles tendon irritation, and IT band syndrome. Beyond the injury side, poor cleat position also means you’re leaving watts on the table. When your foot isn’t properly aligned over the pedal spindle, you’re literally working harder for less output—not exactly the recipe for PR-ing your local Strava segment.
Here’s the thing that trips up a lot of riders: there’s no universal “correct” cleat position. Your friend’s setup won’t work for you, and those marks on your new shoes are just starting suggestions. Your body’s unique biomechanics—including natural foot angle, leg length, hip width, and even old injuries—all factor into finding your optimal position. A personalized setup beats a generic one every single time. For a comprehensive look at how proper positioning impacts your overall riding, check out our bike fitting guide.
Step-by-Step Cleat Position Setup
Ready to get your cleat position right? This process takes some patience and fine-tuning, but it’s worth every minute you invest. Grab your shoes, cleats, and a 4mm Allen key—let’s do this.
Fore-Aft Cleat Position: Finding Your Ball of Foot
Understanding fore aft cleat positioning cycling is your first priority. The golden rule here: position your cleats so the ball of foot (the bony prominence at the base of your big toe, also called the first metatarsal head) sits directly over or slightly behind the pedal spindle when you’re clipped in.
Here’s how to position cleats on cycling shoes for proper fore-aft alignment: First, feel for that metatarsal head on the inside of your foot while wearing your cycling shoes. Mark that spot on the outside of your shoe with a piece of tape or a marker. Install your cleats in a neutral position, clip in, and have someone mark where the pedal spindle lines up on your shoe. Adjust the cleats forward or backward until that spindle mark aligns with your metatarsal mark.
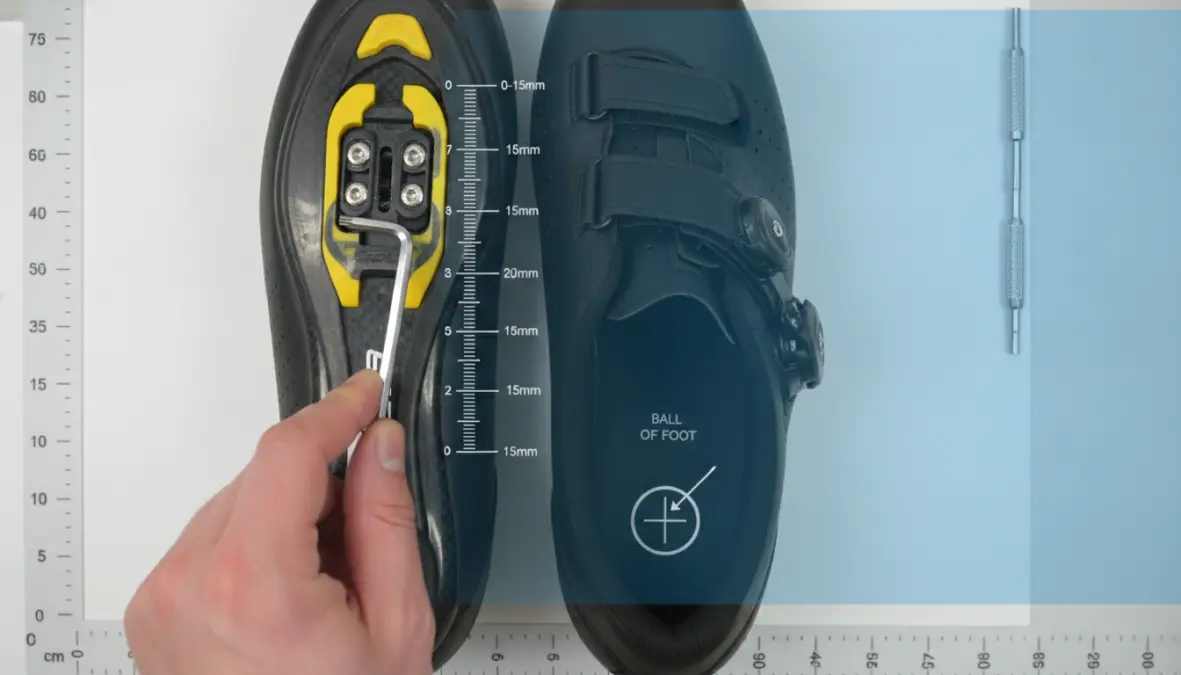
Now, how far forward should cleats be positioned? For most riders, having the ball of foot 5-10mm ahead of the spindle works well for general riding. Climbers and endurance riders often prefer the ball slightly further back (more mid-foot), which reduces calf strain on long efforts. Sprinters and track riders typically position cleats further forward for explosive power—though this increases achilles stress.
There’s a key difference with SPD cleat positioning versus road bike cleats: mountain bike shoes with recessed SPD cleats have the cleat sitting further back in the shoe, naturally placing your foot more mid-foot over the pedal. Road cleats bolt directly to the sole with more adjustment range, giving you greater fore-aft control.
Lateral and Rotational Cleat Alignment
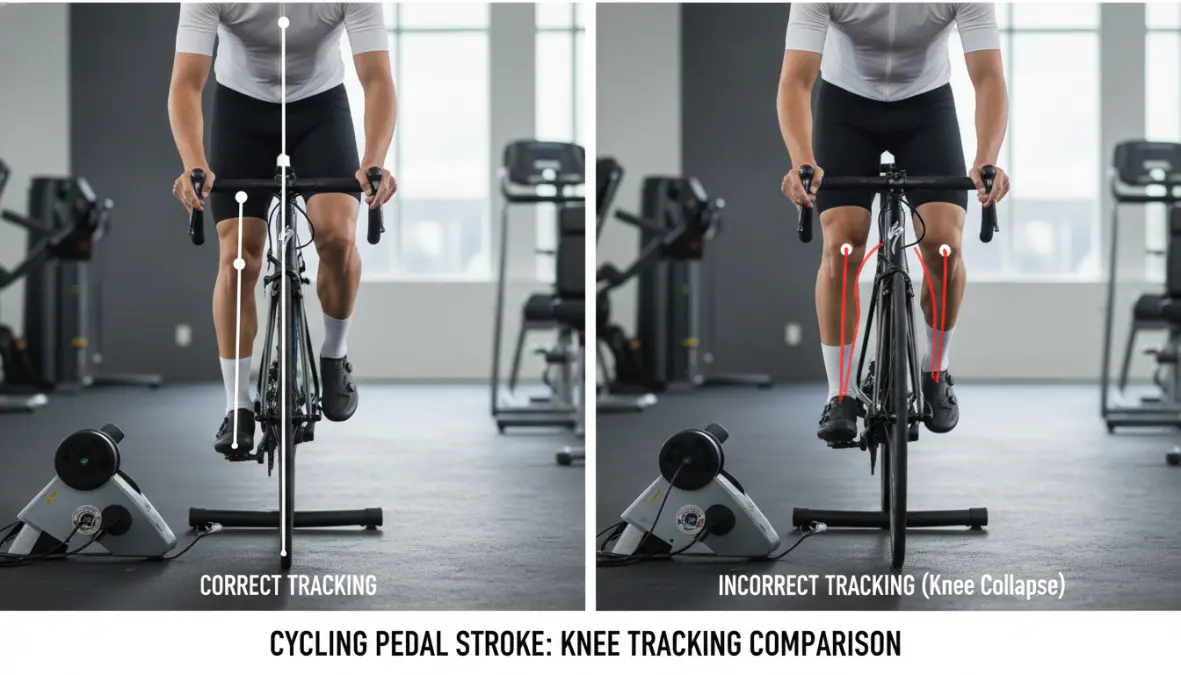
Once fore-aft is sorted, dial in your pedal cleat alignment laterally and rotationally. Lateral positioning (moving the cleat toward the inside or outside edge of the shoe) affects your stance width and knee tracking. Most riders benefit from positioning cleats to allow their feet to sit where they naturally want to be—not forced inward or outward.
Your bike’s q factor (the distance between the pedal attachment points) is fixed, but you can adjust how far inboard or outboard your foot sits on the pedal. If you’re experiencing knee pain that tracks inward or outward during the pedal stroke, lateral adjustment is often the solution. The best cleat position for knee pain typically allows your knee to track straight up and down, aligned with your foot and hip.
Rotational alignment—the angle of your cleat relative to the shoe’s centerline—should match your natural foot angle. Stand naturally and look down at your feet: they probably angle outward slightly (duck-footed) rather than pointing perfectly straight. Your cleats should mirror this. To find your angle, clip in with cleats loosely attached, pedal easily for a few minutes, then carefully unclip and tighten the cleats exactly where they settled.
Float adjustment is your final consideration. Float allows your heel to move inward and outward while clipped in. Most riders benefit from 4-6 degrees of float, which accommodates natural biomechanical variation throughout the pedal stroke. Fixed cleats (zero float) can increase knee stress unless your position is absolutely perfect. If you’re using a power meter for training, proper cleat position ensures you’re measuring accurate power output without biomechanical inefficiencies skewing your data.
Common Cleat Positioning Mistakes and How to Fix Them
Let’s talk about where riders go wrong with their bike cleat setup. The most common mistake? Cleats positioned too far forward. This creates excessive leverage on the achilles tendon and calf muscles, leading to that tight, burning sensation and potential tendon issues. The fix: move cleats backward in 2-3mm increments until symptoms improve.
Cleats too far back cause the opposite problem—anterior knee pain because your quad muscles are working overtime to compensate for reduced calf engagement. If your knees hurt at the front after climbing or hard efforts, try moving cleats forward slightly.
Incorrect rotational angle is sneaky because symptoms develop gradually. If your feet feel “locked” in an uncomfortable position or your knees track inward/outward during the stroke, revisit that rotational setup. Don’t be afraid of asymmetry—most humans aren’t perfectly symmetrical, and your left and right cleats might need slightly different angles.
Understanding cleat positioning to prevent injury means embracing iteration. Make small adjustments (2-3mm max), ride for at least a week, then reassess. Your body needs time to adapt to changes. Keep notes on what you adjusted and how it felt—this creates a roadmap for fine-tuning.
When should you call in professional help? If you’ve tried adjustments but still experience persistent pain, have significant leg length discrepancy, previous injuries affecting your biomechanics, or you’re optimizing for competitive performance, a professional bike fit is worth every penny. The investment in proper positioning pays dividends in comfort, power, and longevity in the sport.
FAQ
How often should I check my cleat position?
Check your cleats every 2-3 months for wear and position drift. Cleats can shift slightly as bolts loosen through repeated clipping and unclipping. Always check after replacing cleats or shoes, and anytime you experience new discomfort. Mark your optimal position with a permanent marker so you can verify alignment at a glance.
What’s the difference between SPD and road cleat positioning?
SPD (mountain bike) cleats are smaller, recessed into the shoe sole, and offer less fore-aft adjustment range. They naturally position your foot more mid-foot over the pedal. Road cleats (SPD-SL, Look, Shimano) bolt to a smooth sole with wider adjustment range in all directions, giving more precise control over position. How to set up SPD SL cleats follows the same principles, but you’ll have more adjustment slots to work with.
Can incorrect cleat position cause knee pain?
Absolutely. Knee pain is the most common symptom of poor cleat setup. Anterior knee pain often indicates cleats too far back, while posterior or achilles pain suggests cleats too far forward. Lateral knee pain (outside) or medial pain (inside) typically relates to rotational alignment or stance width issues. Addressing cleat position should be your first step before assuming the problem requires medical intervention.
How much float should I have in my cleats?
Most recreational and competitive riders benefit from 4-6 degrees of float. This allows natural movement without creating instability. Track sprinters and some time trialists prefer fixed cleats (zero float) for maximum power transfer, but this requires absolutely perfect positioning and increases injury risk. Start with float and only consider fixed cleats if you have a professional fit and specific performance goals.
When should I replace my cycling cleats?
Replace cleats when you notice difficulty clipping in or out, visible wear on the contact surfaces, or if they’ve become loose despite tightening bolts. Most cleats last 2,000-5,000 kilometers depending on how much walking you do in them. Always replace cleats in pairs to maintain consistent float and release tension, and mark your position before removing old cleats so replacement setup is quick and accurate.
Getting your cycling cleat positioning right isn’t a one-and-done deal—it’s an ongoing process of refinement as your fitness, flexibility, and riding style evolve. But nail this foundation, and everything else—from your cadence training to your sprint efforts—will feel smoother and more powerful. Your knees will thank you, your power numbers will improve, and those long rides will feel a whole lot better. Now get out there and make those adjustments count.