Cycling Cleat Position: How Setup Affects Power and Injury Risk
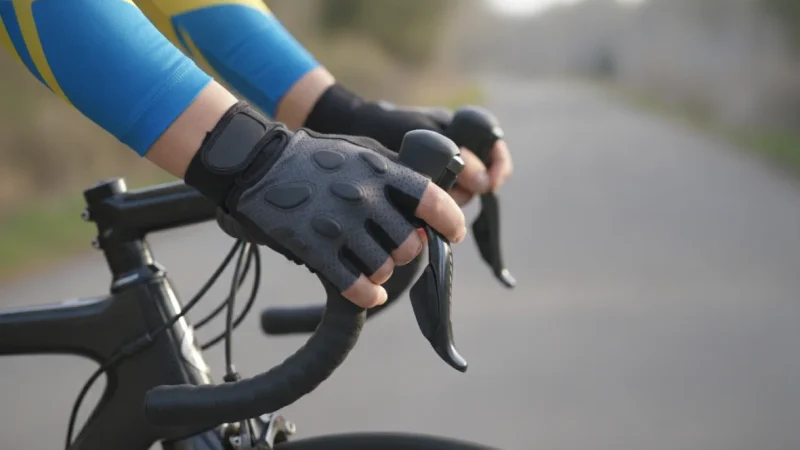
You’ve probably spent hours dialing in your saddle height and handlebar reach, but when was the last time you seriously looked at your cycling cleat position? Most riders clip in with factory settings and never touch them again—yet this tiny contact point between you and your bike can make or break your comfort, power output, and long-term joint health. We’re talking millimeter-level adjustments that can mean the difference between crushing your power targets and limping home with screaming knees.
The connection between your feet and pedals isn’t just about staying attached during sprints. It’s the foundation of your entire bike fitting puzzle, directly impacting biomechanics cycling efficiency and injury prevention. Let’s dive into how to position cycling cleats for power and comfort that actually lasts.
Why Cycling Cleat Position Matters More Than You Think
Here’s a sobering stat: studies suggest that up to 85% of cyclists experience some form of overuse injury during their riding career, and improper cleat placement knee pain ranks among the top culprits. Your cycling cleat position dictates how forces transfer through your ankles, knees, and hips with every single pedal stroke—and at 90 RPM, that’s 5,400 repetitions per hour. Even a 2mm error multiplied across thousands of revolutions becomes a recipe for chronic issues.
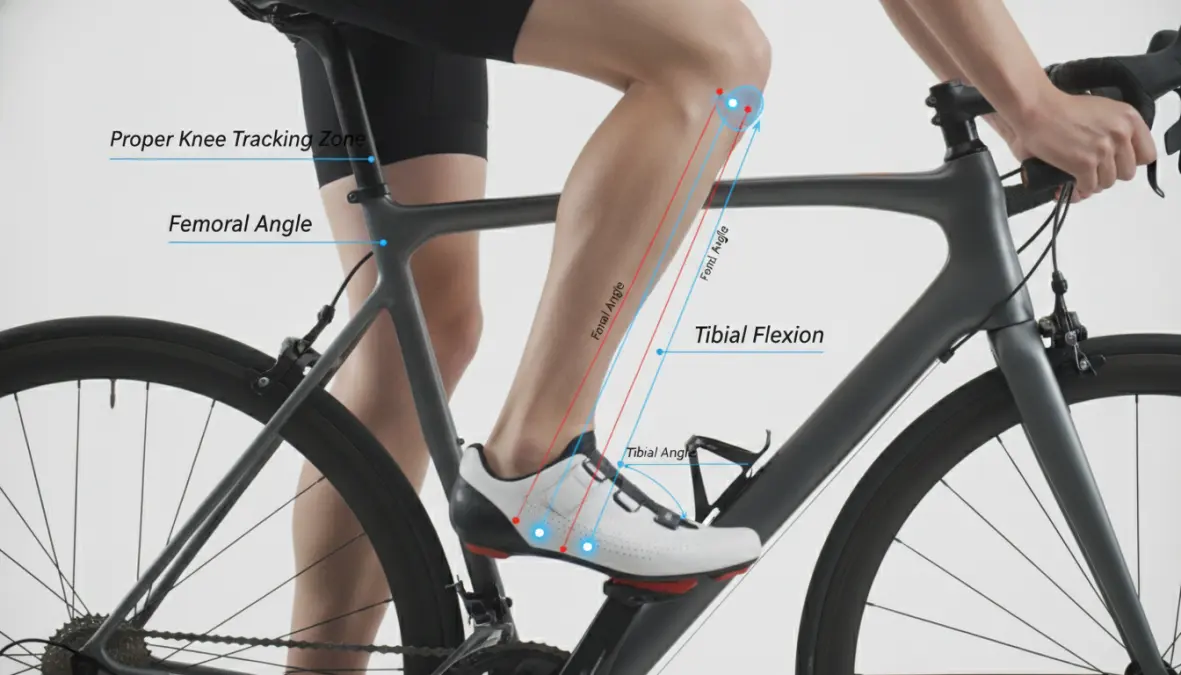
The magic (or misery) happens across three fundamental parameters: fore-aft cleat position (how far forward or back), lateral placement (how close to the crank arm), and rotational alignment (your natural toe angle). Each dimension affects different aspects of your ride. Get the fore-aft wrong, and you’ll sacrifice power transfer or stress your Achilles tendon. Mess up the lateral position, and your knee alignment cycling suffers. Ignore rotation, and you’re setting yourself up for ITB issues or medial knee pain.
The good news? Once you understand these principles, you can achieve cycling power optimization and comfort without expensive lab testing. Small, methodical adjustments make massive differences in pedal stroke efficiency and injury prevention.
The Three Critical Dimensions of Cleat Position Setup
Proper cleat position setup isn’t one-size-fits-all, but it follows consistent biomechanical principles. Let’s break down each dimension so you can nail your bike cleat alignment like a pro.
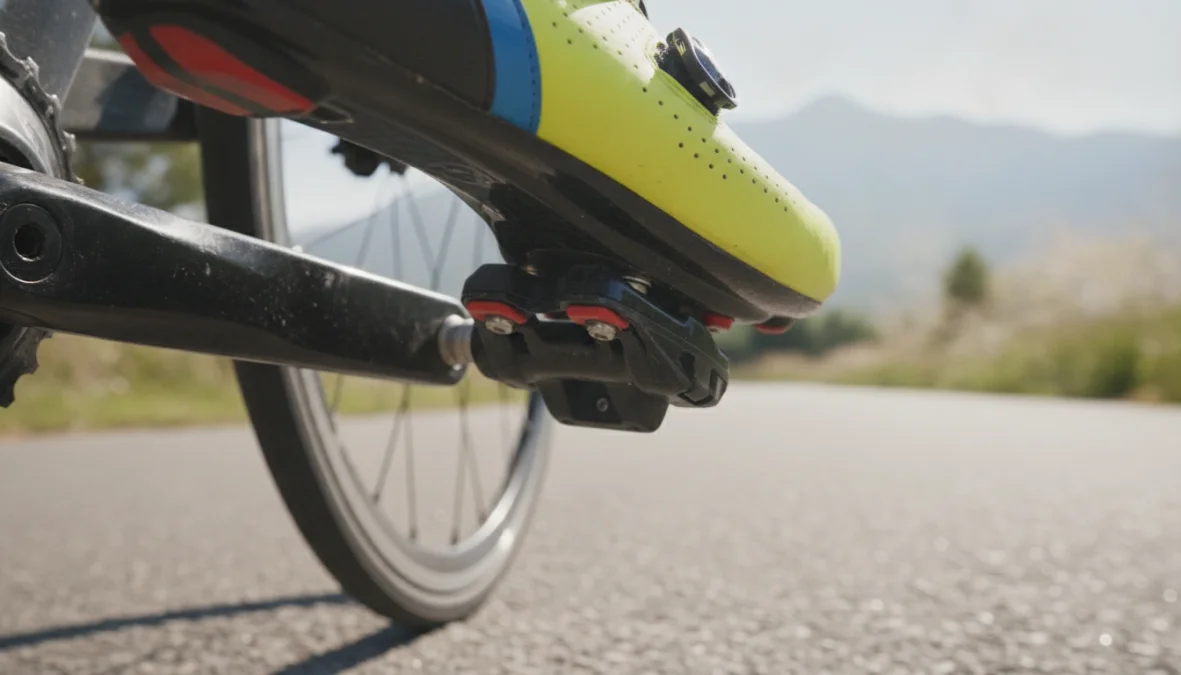
Fore-Aft Cleat Position and Power Transfer
The classic rule states: position the ball of your foot (first metatarsal head) directly over the pedal spindle. This maximizes leverage and recruits your quadriceps efficiently. However, the best cleat position to prevent knee pain and optimize power varies by rider style and physiology.
Moving your cleats forward (ball of foot behind the spindle by 5-10mm) shifts work to your calves and Achilles, reducing quad demand but increasing calf strain—useful for climbers who want to preserve their quads. Positioning cleats back (ball 10-15mm ahead of spindle) emphasizes quad power, ideal for time trialists and sprinters seeking maximum wattage, but can overload the knee joint.
To find your sweet spot for fore aft cleat position for cycling efficiency, start with the ball-over-spindle baseline. During test rides, notice if you’re getting foot numbness or hot spots (cleats too far forward) or feeling excessive calf burn (cleats too far back). The optimal range typically falls within 5-15mm behind the ball, but track cyclists might push further forward while ultra-endurance riders often go further back for comfort over 8+ hour days.
Lateral Position and Cleat Angle Adjustment
Your Q-factor—the distance between your feet on the pedals—affects everything from hip comfort to knee tracking. Most pedal systems offer 5-10mm of lateral adjustment through spacers or cleat slots. The goal: position your feet naturally, as if you were standing barefoot, avoiding artificial narrowing or widening that forces unnatural knee alignment cycling patterns.
Start by placing cleats in the middle of their lateral range. If you experience lateral knee pain (outside), try moving feet slightly wider. Medial knee pain (inside) often improves by bringing feet inward—but never force an unnatural stance just to look “more aero.”
Rotational cleat angle adjustment might be even more critical. Walk naturally and observe your foot’s angle—most people have a slight outward rotation (duck-footed). Force your feet perfectly straight on the bike, and you’re asking for trouble. To determine the correct cleat angle to avoid injury, stand relaxed and note your natural toe angle, then replicate it in your cleat setup. Most riders need 3-8 degrees of outward rotation.
Float adjustment provides rotational freedom within each pedal stroke. Beginners should start with more float (6-9 degrees) to accommodate natural movement. Experienced riders chasing maximum power transfer might prefer fixed cleats or minimal float (0-3 degrees), but only after perfecting static alignment.

Common Cleat Position Mistakes That Cause Injury and Power Loss
Even experienced cyclists make these optimal cleat positioning blunders. Here’s what to avoid:
Cleats positioned too far forward: This overloads your calves and Achilles tendon, creating excessive plantarflexion during the power phase. You’ll feel calf cramps on long rides and might develop chronic Achilles tendinitis. Pull them back 3-5mm if you’re experiencing these symptoms.
Cleats too far back: While comfortable initially, this sacrifices leverage and forces your knees to work through greater flexion angles under load. Power meters will show reduced peak watts, and you might notice anterior knee pain. How cleat placement affects cycling performance becomes obvious when you’re leaving 20+ watts on the table.
Ignoring natural foot angle: Fighting your biomechanics creates rotational stress at the knee joint. If your cleats force a straight foot position but you naturally walk duck-footed, you’re twisting your knee with every stroke. This is a primary cause of iliotibial band syndrome and medial knee tracking issues.
Copying someone else’s setup: Your training partner’s perfect position might be your nightmare. Leg length, foot arch, ankle flexibility, previous injuries—all these factors make bike cleat alignment deeply personal. Proper cleat positioning for beginners starts with baseline principles, not mimicking pros.
Neglecting cleat and shoe wear: Cleats wear unevenly, and shoe soles compress over time, both shifting your effective position by millimeters. Replace cleats every 3,000-5,000 km and reassess setup when changing shoes.
Setting both sides identically without testing: Many riders have slight leg length discrepancies or asymmetric flexibility. Sometimes one cleat needs slightly different positioning than the other for balanced pedal stroke efficiency.
Warning signs your setup needs attention: hot spots or numbness in feet, knee pain (especially on one side), hip discomfort, lower back tension after rides, or feeling like you can’t access your full power. These are your body’s way of screaming that something’s mechanically wrong.
FAQ: Cycling Cleat Position Questions Answered
How do I know if my cleats are positioned correctly?
You should be able to complete your typical rides without hot spots, numbness, or joint pain. Your power output feels consistent, and you can maintain proper cycling cadence without excessive fatigue in specific muscle groups. If you’re questioning your setup, video analysis or a professional bike fit can identify issues. The best confirmation comes from pain-free riding and stable power meter numbers across different ride types.
Can cleat position cause knee pain?
Absolutely—it’s one of the most common causes of cycling-related knee pain. Incorrect fore-aft position creates inappropriate lever arms and loading patterns, while poor rotational alignment forces the knee to twist with each pedal stroke. Lateral positioning affects Q-factor and hip-to-knee-to-ankle alignment. Most cleat-related knee pain resolves within 2-3 weeks of correcting the setup, making it worth investigating before assuming you need medical intervention.
Should cleats be in the same position on both shoes?
Start with identical positioning as your baseline, but don’t assume symmetry is optimal. Many riders have subtle biomechanical differences—leg length discrepancies, previous injuries, or asymmetric flexibility. If you experience pain on only one side despite matched cleats, consider adjusting that side independently. Mark your current positions before experimenting so you can track changes systematically.
How often should I adjust my cleats?
Check them every 3-4 months for physical wear and bolt tightness. Reassess positioning when changing shoes, replacing cleats, after injuries, or if you’re experiencing new discomfort. As your fitness evolves—particularly changes in flexibility or muscle balance—your optimal position might shift slightly. Serious cyclists should consider a full pedal cleat adjustment review annually as part of comprehensive maintenance.
What’s the difference between fixed and floating cleats for positioning?
Fixed cleats lock your foot at a precise angle with zero rotational freedom, maximizing power transfer but demanding perfect static alignment. Floating cleats (offering 3-9 degrees of rotational play) accommodate natural movement and forgive minor positioning errors, reducing joint stress. Most riders benefit from some float—it’s injury insurance. Only consider fixed cleats after perfecting your alignment and if you’re chasing marginal gains in cycling performance.
Your cycling cleat position deserves the same attention you give to training plans and equipment upgrades. Those tiny adjustments under your feet ripple through your entire kinetic chain, affecting comfort, efficiency, and longevity in the sport. Start with the principles outlined here, make small changes methodically, and listen to your body’s feedback. The investment of an afternoon fine-tuning your cleat setup for maximum power transfer pays dividends in every ride you’ll ever do. Now get out there and find your perfect position—your knees will thank you.