Cycling Handlebar Tape Guide: How to Choose and Install the Perfect Bar Tape
There’s something almost meditative about wrapping fresh bar tape on your road bike. The transformation from worn, grimy grip tape to pristine, cushioned perfection instantly makes your bike feel new again. But beyond aesthetics, choosing the right cycling handlebar tape and installing it properly can dramatically affect your comfort, control, and performance on the bike. Whether you’re dealing with numb hands on long rides or struggling with sweaty palms on summer climbs, this cycling handlebar tape guide will help you make smarter choices and achieve professional-looking results.
Understanding Handlebar Tape Materials and Their Performance
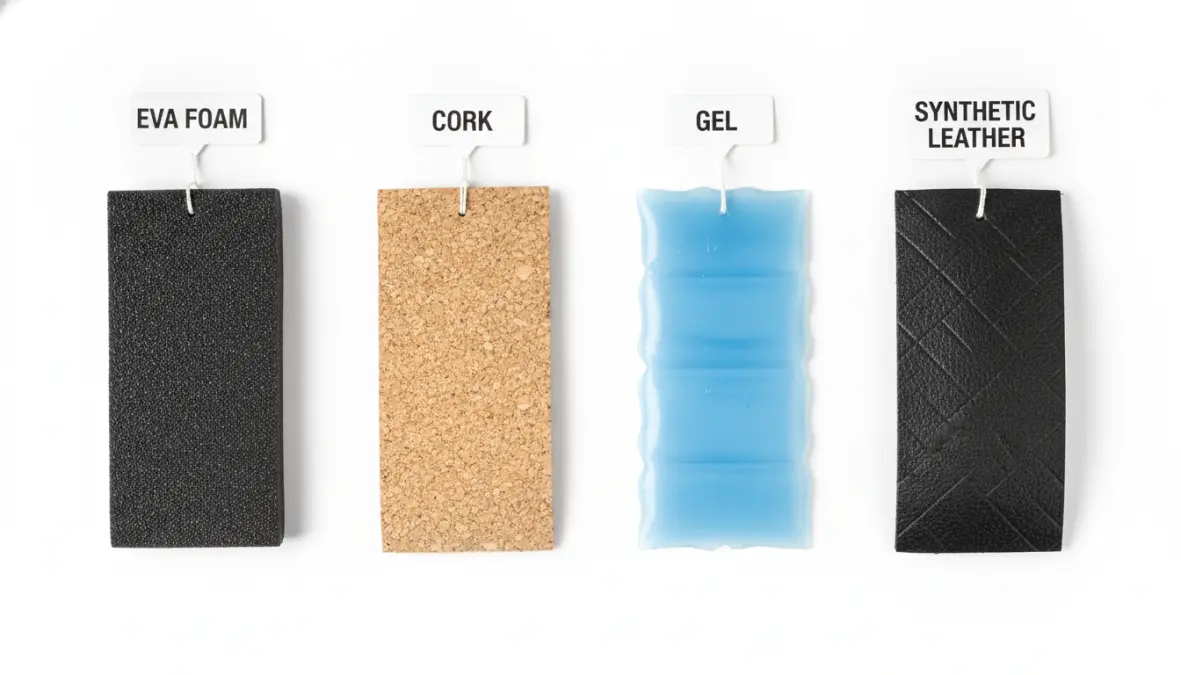
The world of handlebar tape materials has evolved far beyond simple cotton cloth. Today’s best cycling bar tape options span a range of technologies, each designed for specific riding conditions and preferences. Let’s break down the most common materials you’ll encounter in this bar tape comparison.
EVA foam represents the budget-friendly workhorse of bar wraps. This synthetic material offers decent cushioning at an accessible price point, making it perfect for beginners or riders who change tape frequently. However, EVA foam typically provides less vibration damping than premium options and can compress over time, especially under heavy use.
Cork tape has long been the gold standard for serious cyclists. Natural cork provides excellent vibration absorption, breathability, and a classic feel that many riders prefer. Cork naturally wicks moisture away from your hands, making it ideal for sweaty conditions. The trade-off? Cork is more susceptible to UV degradation and requires more careful maintenance to preserve its appearance.
Gel padding options incorporate gel inserts or gel-infused materials that excel at dampening road vibrations. If you’re tackling rough pavement or gravel roads, gel can significantly reduce hand fatigue on long rides. The downside is reduced road feedback and slightly more weight compared to thinner materials.
Synthetic leather and microtex materials offer the most premium feel with exceptional durability. These materials resist weathering better than natural options and provide a smooth, consistent texture. They’re particularly popular among riders who want their bikes to maintain that showroom appearance, though they command premium prices.
| Material | Grip | Comfort | Durability | Price |
|---|---|---|---|---|
| EVA Foam | Good | Moderate | Moderate | $ |
| Cork | Excellent | Very Good | Good | $$ |
| Gel | Good | Excellent | Very Good | $$$ |
| Synthetic Leather | Very Good | Good | Excellent | $$$ |
When choosing materials for cycling handlebar tape, consider your riding style. Racers often prefer thinner cork or microtex for direct road feedback and reduced weight. Endurance riders gravitate toward gel or thicker cork for maximum comfort during long rides. Gravel and adventure cyclists typically opt for extra cushioning to handle rough surfaces.
Bar Tape Thickness: Finding Your Comfort Sweet Spot
Bar tape thickness dramatically affects how your bike feels in your hands. Standard options range from razor-thin 1.8mm racing tape to plush 3.5mm+ cushioned varieties. Understanding how to choose the right handlebar tape thickness depends on several factors.
Thinner tape (1.8-2.5mm) provides maximum bar feel and road feedback. You’ll sense exactly what your tires are doing, which helps with bike handling precision. Many racers prefer this direct connection, especially when optimizing their cycling position and equipment for performance. The trade-off is less vibration dampening and potentially more hand fatigue on rough roads.
Medium thickness (2.5-3.0mm) represents the sweet spot for most riders. It balances comfort with adequate road feedback, making it versatile enough for everything from training rides to gran fondos. This range works well for riders with average hand sizes and mixed terrain.
Thick tape (3.0mm+) prioritizes comfort above all else. If you experience hand numbness, have larger hands, or regularly ride rough pavement, extra cushioning can be transformative. The additional padding also increases handlebar diameter, which some riders find more comfortable to grip for extended periods.
Here’s a practical tip: if you’re unsure what thickness handlebar tape should i use, consider your handlebar diameter and hand size together. Riders with smaller hands on standard 31.8mm bars might find thick tape creates an uncomfortably large grip circumference, while those with larger hands might appreciate the added girth.
Texture, Color, and Weather Considerations
Texture plays a crucial role in how well you maintain control, especially in wet conditions. Smooth tape looks sleek but can become slippery when combined with sweat or rain. Textured or perforated surfaces channel moisture away and maintain grip even when drenched. If you live in a humid climate or tend to sweat heavily, prioritize grip-enhancing textures over smooth aesthetics.
Color choice extends beyond matching your frame. Light-colored tape shows dirt quickly but makes it obvious when cleaning is needed. Dark colors hide grime but can fade noticeably under UV exposure. Black remains the most popular choice for practical reasons—it disguises wear and matches virtually any bike. That said, strategic color choices can accentuate your bike’s design or add personality.
Weather resistance varies significantly between materials. Synthetic options handle rain and temperature extremes better than natural cork, which can degrade faster under intense UV exposure. If your bike lives outdoors or you ride in harsh conditions, invest in materials specifically designed for weather resistance.
How to Wrap Handlebar Tape: Step-by-Step Installation Guide
Mastering handlebar tape installation transforms from intimidating to satisfying once you understand the fundamentals. This road bike tape guide will walk you through step by step handlebar tape installation like a professional mechanic.
Preparation is everything. Remove old bar tape completely, including any adhesive residue. Clean the handlebars thoroughly with isopropyl alcohol. Check for sharp edges or burrs that could damage new tape. Position your brake and shift cables neatly, securing them with electrical tape if needed. Most quality bar tape kits include handlebar plugs, finishing tape, and sometimes adhesive strips for the initial wrap.
Direction matters. Always wrap from the bottom of the drops upward, moving from the outside edge toward the center of the bars. For the right side, this means wrapping counterclockwise when viewing from the bar end. For the left side, wrap clockwise. This ensures that your grip naturally tightens the wrap rather than loosening it.
Start strong. Begin approximately one bar width below the end of your handlebar, angling the tape slightly downward. This allows you to fold the excess inward before inserting the bar plug, creating a clean finish. Apply consistent tension—not too tight or the tape will stretch and tear, not too loose or it will slide and wrinkle.
Overlap correctly. Maintain a consistent 1/4 to 1/3 overlap as you spiral up the bars. Too much overlap wastes tape and creates excessive bulk. Too little creates gaps that expose the handlebar and look unprofessional. The overlap should remain constant throughout the entire wrap.
Navigate the curves. As you approach the curves where drops meet the tops, maintain your overlap ratio but adjust tension slightly to accommodate the changing diameter. This is where practice makes perfect—too much tension causes puckering, too little creates loose sections.
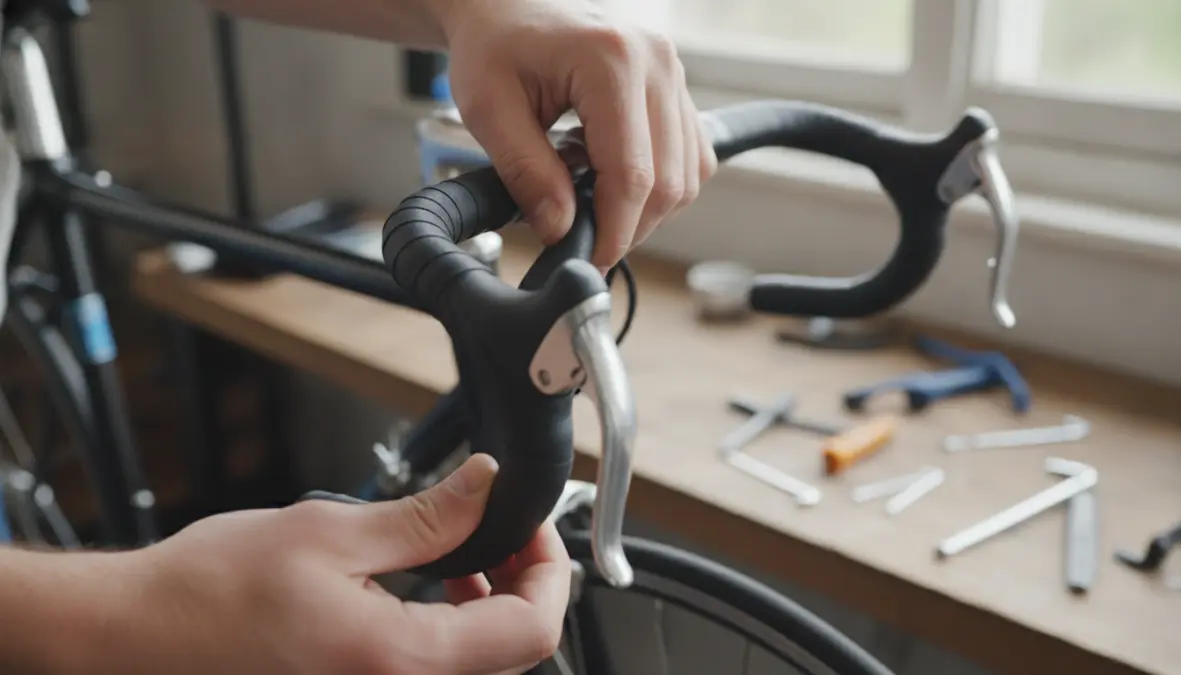
Brake lever wrapping technique. When you reach the brake lever hoods, you have two options. The figure-eight method involves wrapping behind the lever, crossing over the top, then continuing up. Alternatively, use a separate small piece of tape to cover the gap behind the lever, then continue your main wrap over it. Both work; choose whichever gives cleaner results for your specific lever shape.
Finish professionally. End your wrap just past the stem clamp, ensuring complete coverage. Cut the tape at a slight angle for a cleaner edge. Secure with the included finishing tape, wrapping it tightly and evenly. Some riders prefer electrical tape for a slimmer profile. Finally, firmly insert bar plugs—loose plugs rattle annoyingly and eventually fall out.
Common mistakes to avoid: starting too high on the drops leaves exposed handlebar at the bottom; inconsistent tension creates lumpy sections; rushing the lever area creates the most visible imperfections. Take your time on your first attempt—even professionals occasionally unwrap and redo sections to achieve perfection.
For variations with gravel bars or flared drops, the same principles apply, though you may need to adjust overlap slightly through the flare to maintain coverage. Some bikepacking setups benefit from extra tape in high-wear areas where bar bags attach.
Frequently Asked Questions About Cycling Handlebar Tape
How often should you replace bar tape? Most riders replace bar tape every 6-12 months depending on usage and conditions. Frequent riders in harsh weather might need replacement every few months, while fair-weather cyclists can extend tape life beyond a year. Replace immediately if tape becomes dangerously slippery, develops tears, or the adhesive fails.
Can you wrap bar tape over old tape? While technically possible, layering new tape over old is rarely advisable. The added bulk creates an uncomfortably thick grip, and you’re covering potentially damaged or dirty tape rather than starting fresh. The only exception might be adding a thin layer over existing tape temporarily if you’re experimenting with thickness preferences.
Which direction should you wrap handlebar tape? Always wrap from the bar ends upward, moving outward to inward (counterclockwise on the right side, clockwise on the left when viewed from the bar end). This ensures your hand grip tightens the wrap rather than loosening it during normal riding.
What’s the best bar tape for sweaty hands? Cork tape naturally wicks moisture and maintains grip when wet, making it excellent for sweaty conditions. Textured or perforated synthetic options also perform well by channeling moisture away from contact points. Avoid smooth, non-porous materials that become slippery when damp.
How much does professional bar tape installation cost? Most bike shops charge $15-30 for installation if you provide the tape, or $30-50 including mid-range tape. Given that learning how to wrap bar tape like a pro takes just one or two practice attempts, DIY installation saves money and gives you a valuable skill for future maintenance.
Does expensive bar tape make a difference? Premium tape typically offers superior materials, better vibration dampening, longer durability, and more refined aesthetics. For serious cyclists logging significant miles, the comfort improvements justify the investment. Recreational riders might find mid-range options perfectly adequate for their needs, similar to how power meter investment depends on training goals.
Choosing and installing the perfect cycling handlebar tape might seem like a minor detail, but it’s one of those touchpoints that affects every ride. Fresh, properly installed bar wrap improves comfort, enhances control, and makes your bike feel dialed-in and ready for anything. Whether you’re preparing for spring training or just refreshing your trusty steed, taking the time to select the right material and thickness—then wrapping it with care—pays dividends in hand comfort and riding confidence. Now grab some new tape and transform your cockpit.