How to Ride in a Paceline: Master Advanced Group Riding Techniques

There’s nothing quite like the rush of riding in a tight paceline—wheels inches apart, wind practically vanishing as you tuck into the slipstream, and the group humming along at speeds you’d struggle to maintain solo. But here’s the thing: learning how to ride paceline properly isn’t just about going faster. It’s about safety, efficiency, and being a rider others actually want to ride with. Whether you’re preparing for your first group ride or looking to sharpen your peloton riding skills, mastering paceline cycling transforms you from a nervous wheel-watcher into a confident, valued member of any pack.
The beauty of drafting in cycling lies in the numbers: riding behind another cyclist can save you 20-40% of your energy at the same speed. That’s massive. But to unlock those benefits without causing chaos or crashes, you need to understand the fundamentals and respect the unwritten rules that keep everyone rubber-side down.
Understanding Paceline Fundamentals and Formation Types
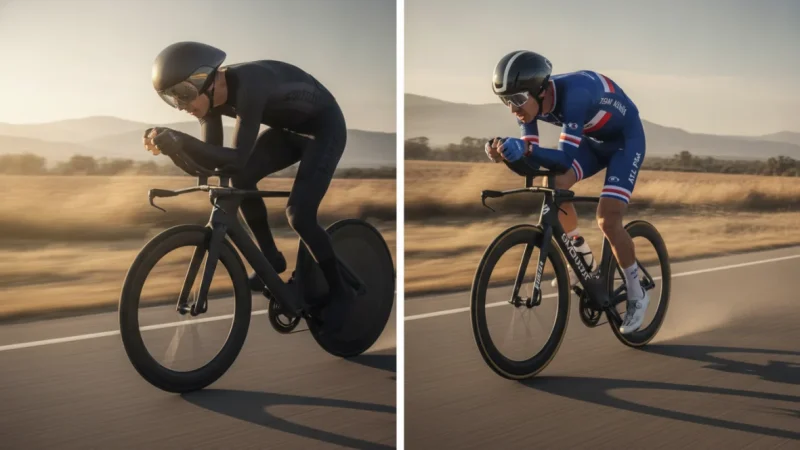
At its core, paceline cycling is organized group riding where cyclists take turns at the front, blocking wind for those behind. The drafting in cycling creates what’s called the slipstream effect—a pocket of reduced air resistance that makes maintaining higher speeds feel surprisingly manageable. Your position matters enormously: ideally, you want to ride about 6-12 inches behind the wheel in front of you (closer for experienced riders, wider for beginners learning group riding techniques).
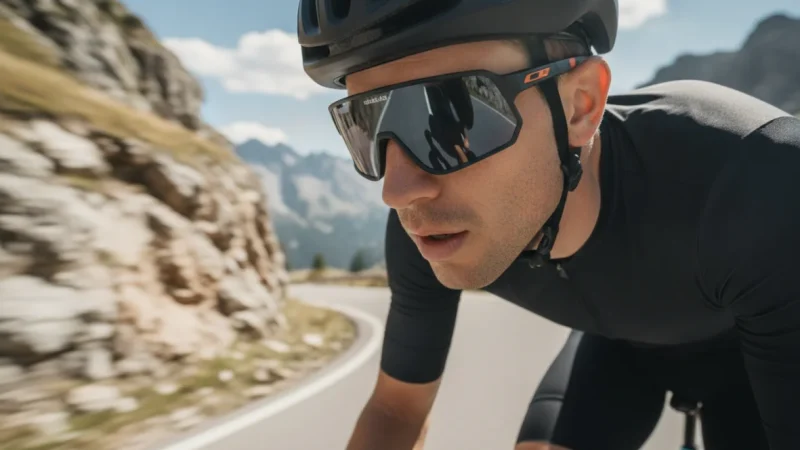
Hand position is critical for quick reactions. Keep your hands on the hoods or drops—never the tops—so you can brake instantly if needed. Your eyes should look ahead through the paceline, not fixate on the wheel directly in front. This wider vision helps you anticipate changes before they happen, which is essential for maintaining pace in a paceline.
Different cycling paceline formation types serve different purposes. A single paceline works best on narrow roads or when riding at high intensity. Riders form one straight line, each taking a turn at the front before peeling off and drifting to the back. A double paceline features two parallel lines, allowing faster rotation and more recovery time—perfect for longer, steadier efforts. Then there’s the echelon formation, a specialized diagonal arrangement for crosswind conditions.
Single vs. Double Paceline Formations
The single paceline is your go-to for maximum speed on constrained roads. When the lead rider has done their pull, they signal and drift to one side (usually left in most countries), soft-pedaling while the line continues past. They then slot into the back position. It’s simple but demanding—each rider spends more time in the wind compared to a double formation.
The double paceline offers more frequent recovery. Two lines ride parallel; when front riders finish their pull, they peel off to their respective sides and drift back along the outside of their line. The key difference? You’re recovering roughly half the time instead of being constantly in the draft or on the front. This formation shines on wider roads during moderate-paced group rides where conversation and camaraderie matter as much as speed. For tips on group dynamics and communication, check out our guide on Cycling Group Ride Etiquette.
Echelon Formation for Crosswinds
When crosswinds hit, the standard straight paceline becomes inefficient—the draft disappears. That’s when experienced groups shift into an echelon formation cycling setup. Riders stagger diagonally across the road, each positioned slightly behind and to the sheltered side of the rider ahead. If wind comes from the right, the echelon angles left; wind from the left creates a right-leaning formation.
This formation demands excellent communication and spatial awareness. Road width often limits how many riders can fit in the echelon (typically 5-8 maximum), meaning some riders get left in the wind if the group is large. Rotation happens similarly to a single paceline, but the lead rider pulls off into the wind direction. Echelons require practice and trust—one mistake can send multiple riders into the gutter or worse.
Mastering the Rotating Paceline Technique
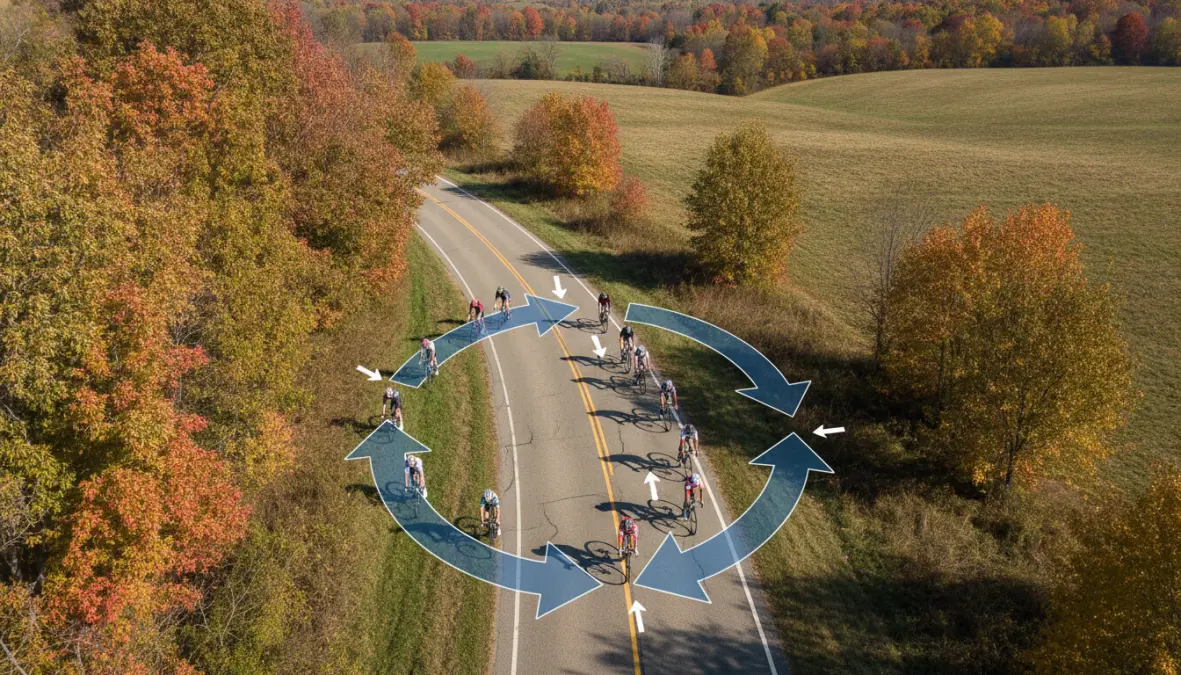
Understanding what is a rotating paceline in cycling is one thing; executing it smoothly is another. The rotating paceline is perhaps the most efficient group riding method, keeping the pace high while distributing effort evenly. Here’s how to ride paceline rotations like a pro: when you reach the front, maintain the established pace—don’t accelerate. This is the biggest beginner mistake and it ruins the rhythm for everyone behind you.
After your pull (duration varies, but typically 30 seconds to 2 minutes), signal with a subtle elbow flick or hand wave, then smoothly drift to the side. Ease off the pedals slightly—don’t brake unless absolutely necessary—and let the paceline flow past while you soft-pedal along the outside. As you approach the back, gradually match the speed of the last rider and slot in behind them. Your pull rotation should feel like a flowing circle, not a series of jerky sprints and recoveries.
Common mistakes in paceline riding include half-wheeling (riding slightly ahead of your partner in a double paceline, forcing them to work harder), overlapping wheels (putting your front wheel beside the rear wheel ahead—a recipe for crashing), and the dreaded brake tap while in the middle of the pack. If you need to scrub speed, sit up slightly to catch more wind rather than touching brakes. Cadence matching is essential; keep your pedaling rhythm consistent with the group to avoid accordioning.
Communication is vital for safe rotation. Call out “Slowing!” before reducing speed, point out potholes and debris, and use hand signals cycling conventions to indicate turns and stops. Learning how to communicate in a paceline transforms chaotic groups into smooth, efficient units.
Proper Pull Duration and Recovery
How long should you stay at the front? That depends on fitness, terrain, and pace. A strong rider might pull for two minutes at moderate speed, while someone struggling might only manage 30 seconds at race pace. The cardinal rule: take pulls that maintain group cohesion. If you’re fresh and it’s windy, extend your pull to shelter others. If you’re cooked, it’s completely acceptable—and encouraged—to signal and pull off after a brief turn or even skip your rotation entirely. Nobody wants you to blow up and create gaps.
On climbs, pulls naturally shorten as intensity increases. On descents or flat tailwind sections, riders can sustain longer efforts. During recovery at the back, focus on deep breathing, light spinning, and staying relaxed. If you’re training for endurance events like a century ride, practicing these rotations builds incredible efficiency—learn more in our Complete 100 Mile Cycling Preparation Guide.
Safety Rules and Group Riding Etiquette

Mastering the mechanics means nothing if you can’t ride safely. Group ride safety starts with predictability—never make sudden movements. No swerving, no abrupt braking, no erratic speed changes. Your fellow riders are making split-second calculations based on your behavior, and unpredictability causes crashes.
Pace line etiquette demands constant communication. Shout “Car back!” when vehicles approach from behind, “Car up!” for oncoming traffic, and “Slowing!” well before you reduce speed. Point at road hazards—potholes, gravel, glass—and echo these calls through the group. If you flatted or have mechanical issues, immediately call out “Flat!” or “Mechanical!” and safely drift to the roadside. The group can decide whether to wait or continue.
The wheel sucking debate deserves mention: while sitting in the draft is the whole point of paceline riding, refusing to ever take a pull when you’re capable earns you a bad reputation. If you’re new or genuinely struggling, communicate that upfront. Most groups appreciate honesty and will accommodate different fitness levels. However, consistent freeloading without contributing makes you unwelcome on future rides.
Never overlap wheels. Period. If the rider ahead moves laterally even slightly, overlapped wheels guarantee a crash. Keep your front wheel behind the rear wheel ahead, with that safe 6-12 inch gap. And if you’re dealing with physical issues that affect your riding position, consult our Bike Fitting Guide to ensure comfort and control during long group efforts.
Understanding these tips for riding in a group paceline and respecting aerodynamic drafting principles keeps everyone safe and efficient. It’s also worth ensuring you’re dressed appropriately for conditions—overheating or being underdressed affects your ability to concentrate and perform safely. Check our Summer Cycling Gear Essentials for hot weather considerations.
FAQ
What is the ideal distance behind the wheel in front?
For experienced paceline riders, 6-12 inches provides maximum draft while allowing reaction time. Beginners should start with 2-3 feet until confident in their bike handling and the group’s consistency. In wet conditions or with unknown riders, increase following distance significantly to account for reduced braking traction and unpredictability.
How do you join a paceline mid-ride?
Approach from behind at the paceline’s speed, never cutting in from the side. Communicate your intention with a friendly “Mind if I join?” and slot onto the back when there’s a natural gap. Match the group’s cadence and speed before attempting any pulls. Observe a full rotation cycle to understand their rhythm before taking your first turn at the front.
What speed should you maintain when taking a pull?
Maintain the exact pace established by previous riders—no faster, no slower. Use your cycling computer or perceived exertion to match speed. Accelerating at the front, even slightly, creates accordion effects that exhaust riders at the back. Consistency is far more valuable than speed. If the pace feels too high for you to maintain during your pull, it’s perfectly acceptable to pull through briefly and rotate off.
How do you signal you’re too tired to pull through?
When approaching the front, give a clear wave-off or shake your head to indicate you’re skipping your turn. Immediately drift to the side and let the rider behind continue forward. Call out “Skipping!” or “Sitting in!” so others understand. Experienced groups expect this and appreciate the honesty—blowing up mid-pull and creating gaps hurts everyone more than simply sitting out a rotation.
Mastering how to ride paceline formations elevates your cycling from solo efforts to the strategic, social experience that makes group rides addictive. The energy savings, increased speeds, and camaraderie are unmatched—but they demand respect for technique, communication, and your fellow riders. Start with beginner-friendly groups, practice the fundamentals, and gradually build confidence in different formations and conditions. Before long, you’ll find yourself leading rotations, calling out hazards, and being the rider everyone trusts to sit on their wheel. Now get out there and find a group ride—your paceline education awaits.